Programming with Arduino IDE!
Setup for using Arduio IDE
- Because Axio Builder is not a built-in platform in the Arduino IDE, a series of tasks are required to develop an Axio Builder application using the Arduino IDE.
Add Boards Manager URL
- Axio Builder is an unofficial 3rd party platform for Arduino. It is not automatically listed in Arduino’s board manager.
- To select the Axio Builder from the board manager, add the URL of the Axio builder in the ‘File -> preferences -> Settings(tab)’.
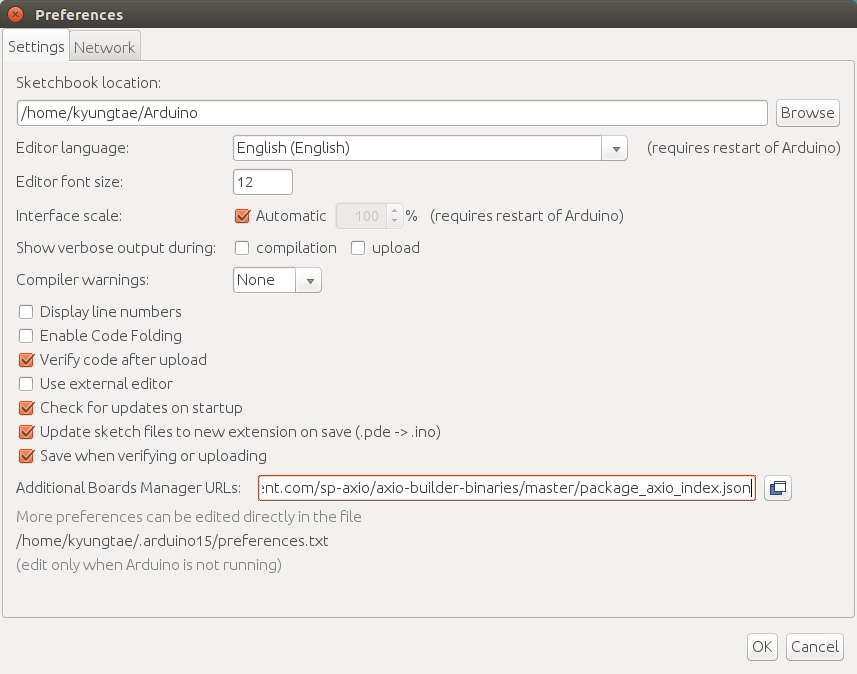
- Copy following URL and paste to ‘Additional Boards Manager URLs:’.
https://raw.githubusercontent.com/sp-axio/axio-builder-binaries/master/package_axio_index.json Install Axio Builder Package
- Open Boards Manager ‘Tools -> Board -> Boards Manager…’.
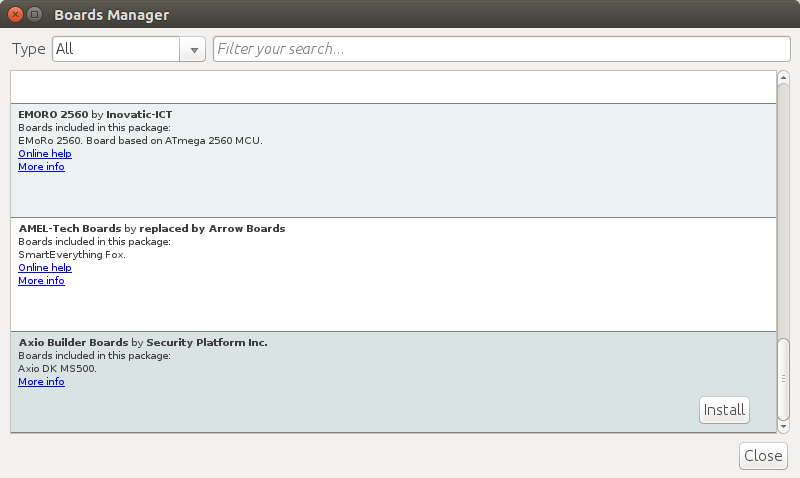
- Click ‘Axio Builder Boards’ and click the ‘Install’ button.
Install Private Key for Signing in the Arduino IDE
- Axio Builder adds a signature to the firmware, to anti-forgery of the firmware.
- To developing the firmware of Axio Builder in Arduino IDE, certificate must be installed in Arduino IDE and signing must be done.
- The authentication algorithm uses prime256v1 among the elliptic curves.
- Currently, the certificate type is not supported for signature verification, but is used simply as a public key.
- If the EC prime256v1 key pair does not yet exist and is for testing purposes, you can generate ‘Elliptic Curve Key Pair’.
※ CAUTION! Be careful not to lose the keys you generate. ※
- Generate Private Key (Curve: prime256v1)
  $ openssl ecparam -genkey -name prime256v1 -noout -out private.pem
- Generate Public Key
$ openssl ec -in private.pem -pubout -out public.pem - If the EC prime256v1 key pair is ready, copy the private key to private.pem in the following directory.
- Linux
  {HOME Directory}/.arduino15/packages/SecurityPlatform/hardware/ms500/1.0.0/variants/axio_builder_ms500
- Windows10
  {HOME Directory}\AppData\Local\Arduino15\packages\SecurityPlatform\hardware\ms500\1.0.0\variants\axio_builder_ms500
Certificate download to Axio Builder
- To verify that the firmware has not been forgery during Axio Builder boots, the firmware must be signed and the certificate must be installed on the board.
- Currently, the public key is used instead of the certificate type.
- The certificate can only be downloaded once, and if there is a certificate on the board, it must be removed and then downloaded again.
- Remove certificate
  $ axtool -d private.pem [SERIAL_PORT]
- Download certificate
$ axtool -i public.pem [SERIAL_PORT] - Use ‘axtool’ to download/remove the public key to the board, which is located in the following directory if the Axio Builder package is installed in the IDE.
- Linux
  {HOME Directory}/.arduino15/packages/SecurityPlatform/tools/axtool/1.1.0
- Windows10
  {HOME Directory}\AppData\Local\Arduino15\packages\SecurityPlatform\tools\axtool\1.1.0)
Development of Application with Arduino IDE
compile & upload
- You must specify the board type before ‘Verify/Compile’ or ‘Upload’ your application.
- The board sets up ‘Tools -> Board -> Axio Builder Boards -> Axio DK MS500’.
- In order to upload, specify interface. select ‘Tools -> Port’. ex)”COM0 (Axio DK MS500)”.
-
If you see the following screen during upload, press the Axio board reset button once.
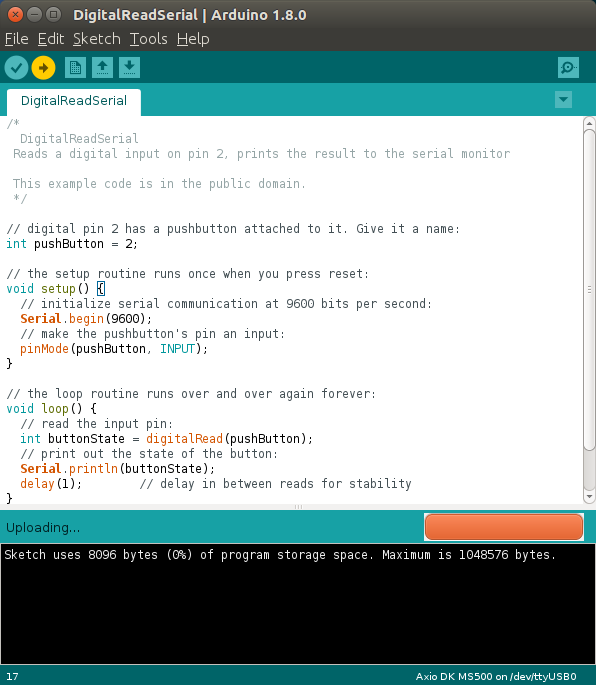
- When the following text appears, the firmware upload is completed.
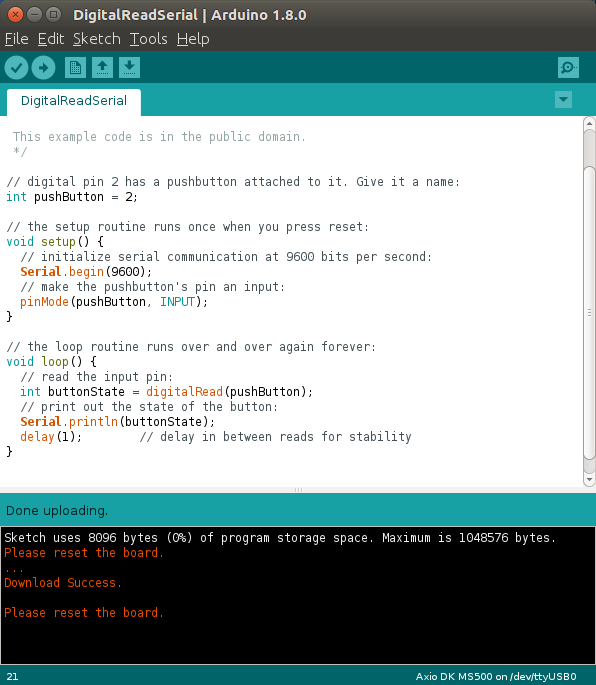
Update Second Loader
- The Second Loader is one of the bootloaders to be performed during the boot process.
- In most cases you do not need an update, but if you need an update, you can do the following:
- If you have installed the Axio Builder package in the IDE, then the Second Loader will install the Axio Builder package in the IDE.
{HOME Directory} \ AppData \ Local \ Arduino15 \ packages \ Security_Platform / hardware / ms500 / 1.0.0 / bootloaders / axio_builder_ms500 \ SecurityPlatform \ hardware \ ms500 \ 1.0.0 \ bootloaders \ axio_builder_ms500- If you want to update to a new second loader, you need to copy the new second loader to this directory first.
- Set the programmer before updating. Select Menu ‘Tools -> Programmer -> Axio ISP’.
- Now select Menu ‘Tools -> Burn BootLoader’.
-
If you see the following screen, press the Axio board reset button once.
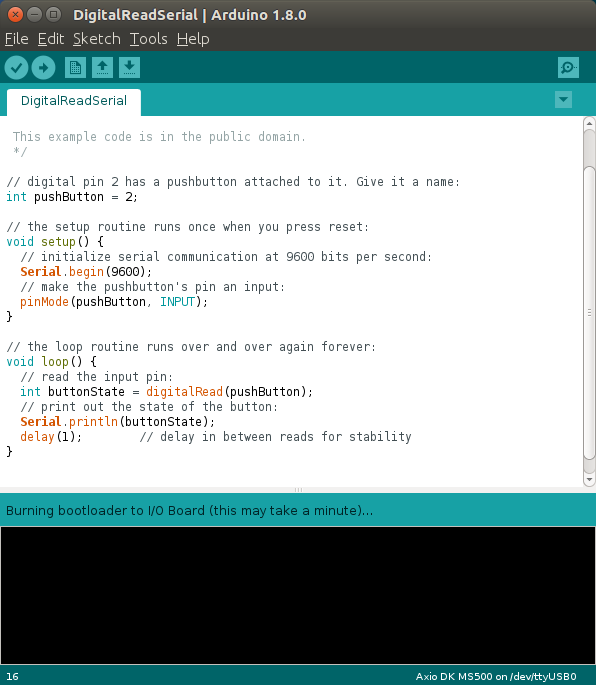
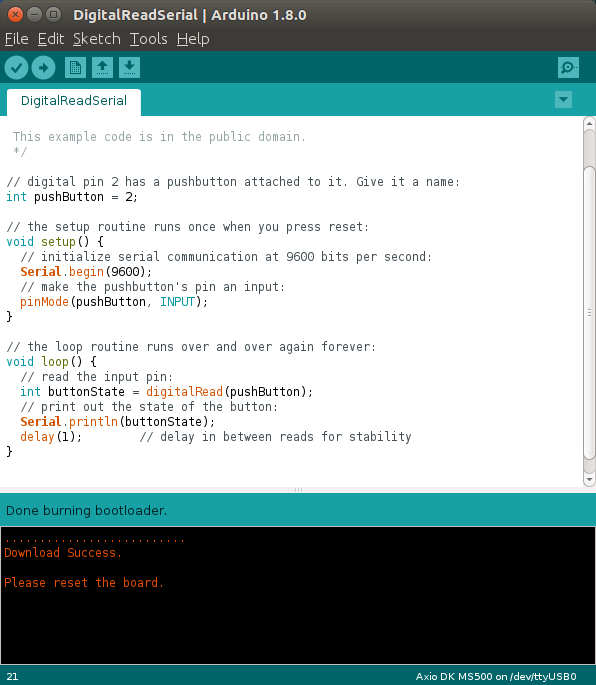
- When the following text appears, the update is completed.
